Configuring VMware Identity Manager for Salesforce – Part 1

Now we’ll look at configuring SAML integration between VMware Identity Manager and Salesforce for Workspace ONE.

Definition:  Security Assertion Markup Language (SAML). It is an open standard which enables SSO for many different services and platforms. Authenticating with SAML allows a user to log in once per session.

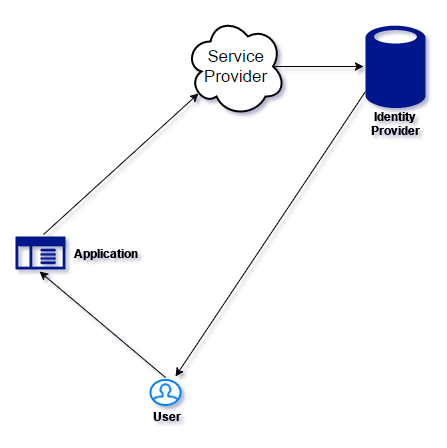
Here are the defining components of SAML:

  • Service provider (i.e. an application.)
  • Identity provider (who is authenticated, and what authentication methods are used.)
  • End user who is accessing over SAML.


idp.png

  1. User starts the SAML Application
  2. Service Provider (SP) sends a request to the Identity Provider (IdP) for authentication
  3. If the user is not authenticated, the IdP requests authentication from the user. (I.e. username and password)
  4. The IdP then sends response to the SP with a token for that user.

Continue reading “Configuring VMware Identity Manager for Salesforce – Part 1”

Installing VMware Enterprise Systems Connector

Things change fast, very fast. So VMware AirWatch 9.1 is out and so is the new installer which serves as the unified connector for Workspace ONE; AirWatch, and Identity Manager.

So if you were used to installing the ACC (AirWatch Cloud Connector) or the Linux appliance vIDM (VMware Identity Manager Connector), you should know that these two products have now been tied into one and have been branded VMware Enterprise Systems Connector.

Which I think is great, as editing a Linux appliance and bash, sudo, cat, vi. Yeah, it was fun.

I’ll walk you through the installation of the VMware Enterprise Systems Connector and enterprise integration.

Continue reading “Installing VMware Enterprise Systems Connector”

Creating a Load Balancer in the Microsoft Cloud: Azure

WHAT IS AZURE LOAD BALANCER?

Azure Load Balancer secures high availability and network performance to your applications/frontend/backend.

It is a Layer 4 load balancer (TCP/UDP) that distributes traffic among instances of services defined in the load-balanced set.

You can load-balance web applications, Virtual Machines, and so-on by routing traffic based on NAT rules that you configure on the load-balancer.

Continue reading “Creating a Load Balancer in the Microsoft Cloud: Azure”

VMware AirWatch PowerShell Integration for Mobile Email Management and more

AirWatch, it’s here to stay.

So let’s talk about AirWatch, Office 365 and Powershell.

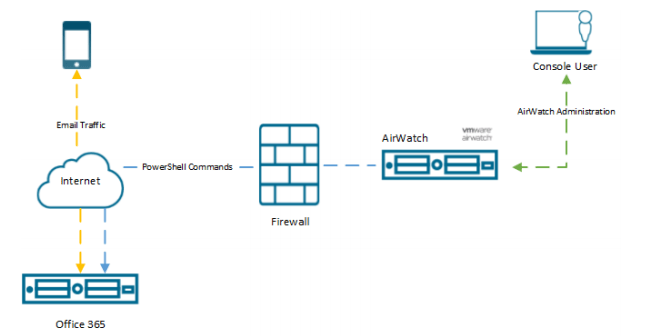
Objective: To enable integration between Powershell and Office 365 to facilitate; AirWatch Mobile Email Management (MEM).


“Mobile Email Management (MEM) functionality in AirWatch delivers comprehensive security for your corporate email infrastructure by allowing only compliant users and devices to access email.”

chrome_2017-08-02_16-05-51.png

Now to getting this up and running

The steps we will be taking are

  • Integrate PowerShell with AirWatch
  • Setting up a PowerShell Admin User
  • Enable Powershell Integration in AirWatch
  • Configure Exchange to Block or Quarantine Devices
  • Email Management
  • Cmdlets Executed by AirWatch

Continue reading “VMware AirWatch PowerShell Integration for Mobile Email Management and more”

Connect to Microsoft Azure with Powershell

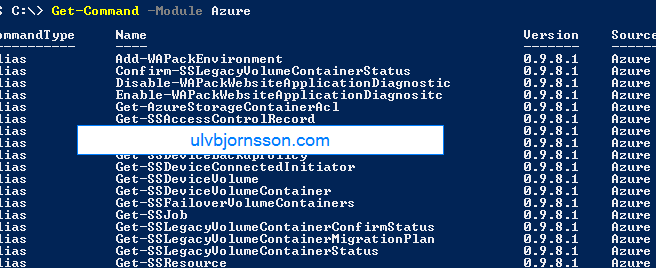
In this article I’ll walk you through the steps needed to connecting to your Microsoft Azure environment, as well as giving you a glimpse of how you can manage it by starting up a IaaS virtual machine.

There is endless potential, to what you can manage and automate of Azure resources with PowerShell, but from here to there, first step is connecting it!

autoallthings.png

Installing Azure PowerShell Module

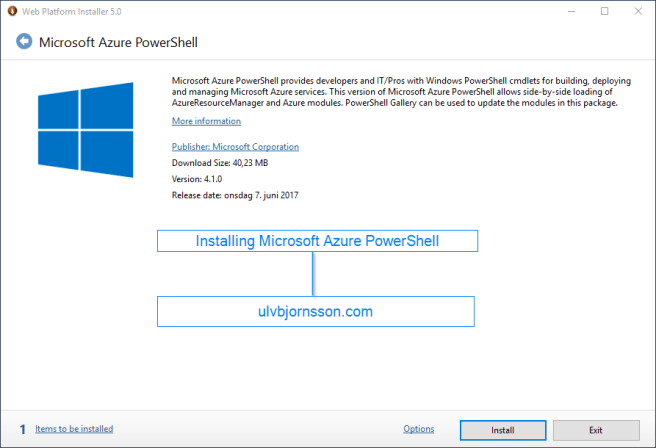
First off we are going to install the Azure PowerShell module

WebPlatformInstaller_2017-07-03_13-05-42
The installer takes a few minutes, once installed we will connect to your Azure subscription.

Continue reading “Connect to Microsoft Azure with Powershell”

Microsoft Azure: Azure PowerShell – ForbiddenError: The server failed to authenticate the request.

Hey, so if you are getting this error I’ll walk you through the easiest ways to remedy it.

powershell_2017-07-03_13-53-48.png

PS C:\> Get-AzureVM
Get-AzureVM : ForbiddenError: The server failed to authenticate the request. Verify that the certificate is valid and i
s associated with this subscription.
At line:1 char:1
+ Get-AzureVM
+ ~~~~~~~~~~~
+ CategoryInfo : CloseError: (:) [Get-AzureVM], ComputeCloudException
+ FullyQualifiedErrorId : Microsoft.WindowsAzure.Commands.ServiceManagement.IaaS.GetAzureVMCommand

or

Set-AzureSubscription : ForbiddenError: The server failed to authenticate the request. Verify that the certificate is valid and is associated with this subscription.

The solution often is easier then you’d think, just like how browsers have their cache so does your Microsoft Azure PowerShell so you’ll want to input this:

Clear-AzureProfile

powershell_2017-07-03_13-58-31.png

This will clear your current Azure profile.

You should also consider deleting the content of this folder:

C:\Users\%USERNAME%\AppData\Roaming\Windows Azure Powershell

After which you can run

Add-AzureAccount / Login-AzureRMAccount

and then you can execute any Azure PowerShell commands that you’d like to run. For a more detailed walkthrough check my article on connecting and managing Microsoft Azure via PowerShell.


PS: If you are still getting errors, you should check whether the mode you are running in is incorrect you can input 

Switch-AzureMode AzureResourceManager

Important to note that “Switch-AzureMode” is deprecated and will be removed in a future release. However doing so seemed to import the certificate and removed the “ServiceManagement” modules that were loaded with this install and installed the correct certificate.

So now to see if it’s working we can run Get-AzureVM or Get-AzureRMvm

which outputs:

powershell_2017-07-03_15-20-32.png


chrome_2017-07-03_15-22-47

As always, you can follow me on Twitter at @UlvBjornsson or follow me on here, if you have tips for articles you’d like to read or topics you want to hear more about, hit me up.

Ulv
Microsoft Azure: Configuring auto-shutdown

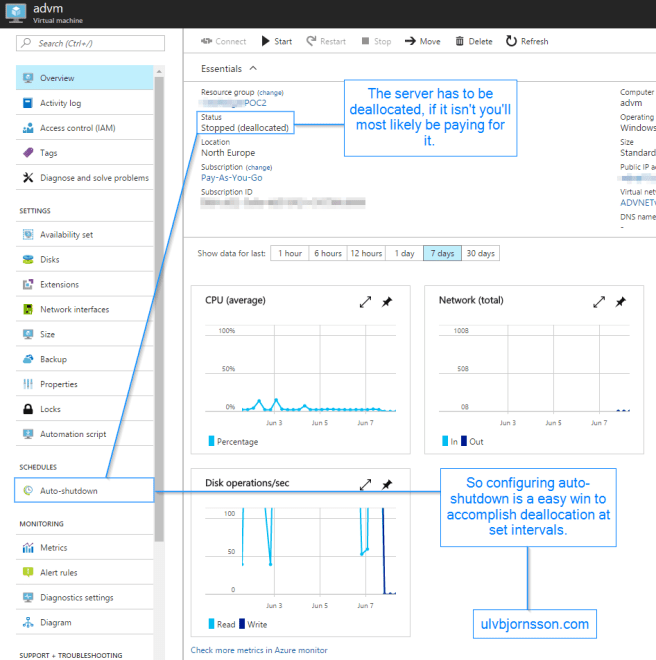
So, in Azure you pay for what you use. If it’s on (or if it is allocated), you are paying for it, until it is deallocated.

So what can we do to save costs? We can configure automatic shutdown.

2017-06-08_13-58-35.png

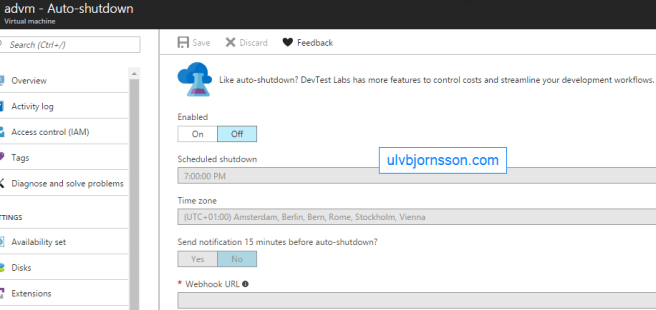
So if we enter “Auto-shutdown” on the left panel in the VM:

chrome_2017-06-08_14-02-47.png

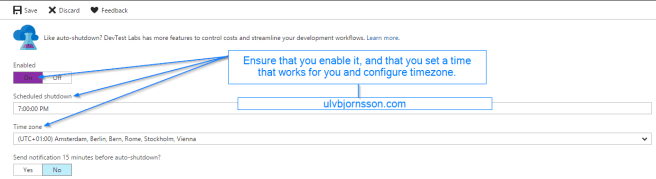
So let’s enable it, and set our preferred time for shutdown. Ensure that you have configured the timezone correctly so that it shutsdown when you expect it to.


chrome_2017-06-08_14-05-14.png

There you go, you’ve configured automatic shutdown on a schedule.

Next up, we’ll be looking at runbooks and the possbility of turning your virtual machines off, but also on again on a fixed schedule.

Stay tuned for more, and always you can reach me here or over on twitter at @UlvBjornsson.

If you are curious about the Azure exam 70-533, you can check out my write up on it over here.

Until next time!

Ulv

Powershell: Move objects from OU to target OU

Simple way to move computers from one OU to a target OU using –LDAPFilter which allows you to modify it. Current form is objectClass meaning it’ll move anything that is designated an objectclass from OU to target OU, you can change this to be (name=PC*) with * being a wildcard moving any object starting with PC from OU to target OU.

<#
.SYNOPSIS  

Sets Moves AD object based on -LDAPFilter from OU to target OU.

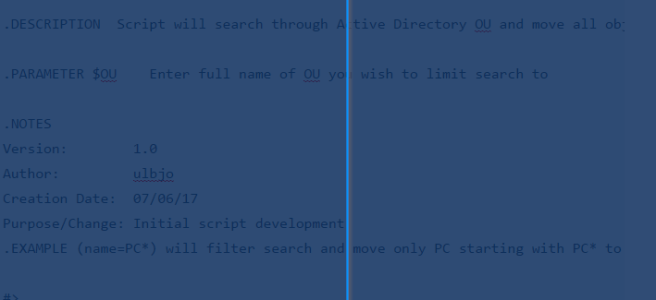
.DESCRIPTION  Script will search through Active Directory OU and move all objects matching -LDAPfilter to target OU.

.PARAMETER $OU    Enter full name of OU you wish to limit search to

.NOTES  
Version:        1.0  
Author:         ulbjo  
Creation Date:  07/06/17  
Purpose/Change: Initial script development  
.EXAMPLE (name=PC*) will filter search and move only PC starting with PC* to target OU.

#>
$computerstomove = Get-ADComputer -LDAPFilter "(objectClass=*)" -SearchBase "CN=Computers,DC=Customer,DC=ulvbjornsson,DC=com"foreach ($computertomove in $computerstomove) { Move-ADObject $computertomove -TargetPath "OU=Computers,OU=Production,DC=Customer,DC=ulvbjornsson,DC=com"
}

#(name=PC*)


As always hit me up, I got a lot of articles in the pipeline so stay tuned.

You can find me here, or interact with me over twitter @UlvBjornsson

Creating a Windows Master Control Panel shortcut .{ED7BA470-8E54-465E-825C-99712043E01C}

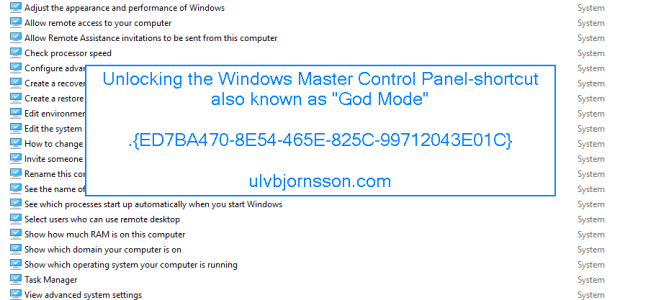
The Windows Master Control Panel, also known as Windows God Mode, or the All Tasks folder is a shortcut to access a variety of control settings found in any operating system later then Windows Vista.

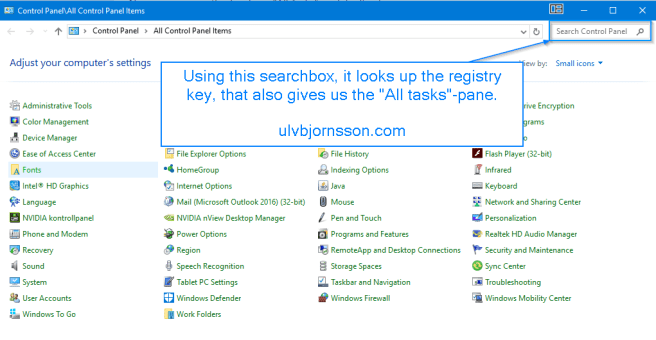
It is one of those stories that hits the blogosphere and spins; however the background for the registry key “ED7BA470-8E54-465E-825C-99712043E01C”  was actually just an “All Tasks“-page created by Windows developers to make it easier to find what was needed.

So if you use the search box in the “Control Panel“-window, see illustration below. It will leverage the key “ED7BA470-8E54-465E-825C-99712043E01C“.

2017-05-12_16-09-47.png

The key that it looks up you can find it under:
HKEY_CLASSES_ROOT\CLSID\{ED7BA470-8E54-465E-825C-99712043E01C}

2017-05-12_16-15-03.png

So now let’s create and give you a shortcut to the blogosphere’s godmode, or the Windows developers “All Task”-folder.

Continue reading “Creating a Windows Master Control Panel shortcut .{ED7BA470-8E54-465E-825C-99712043E01C}”

Allow Domain User To Update Department Field in Active Directory

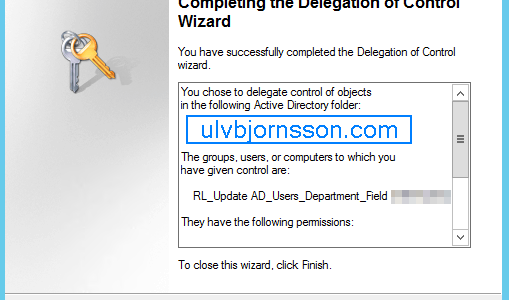
In this article we’ll go through the steps to allow a domain user that is a member of a security group, to update the Department field in Active Directory

So open up Active Directory Users and Computers and create a Security Group that we will delegate control to, for this example we have created a group called “RL_Update_AD_Users_Department_Field”

pep

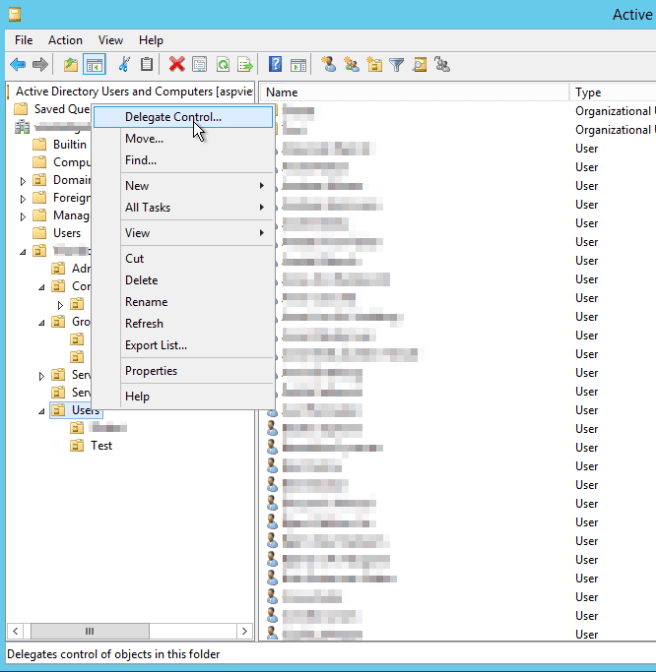
Now we have to also choose the container that this group can edit Users in to for this example we have a “Users”-container in our “domain“.

RoyalTS_2017-05-08_13-58-06

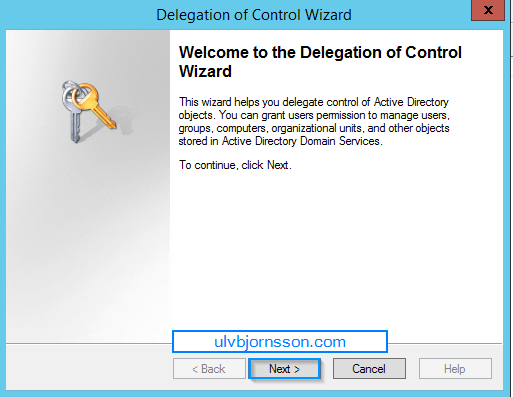
This opens up the Delegation of Control Wizard. Hit Next.

2017-05-08_14-11-21

Continue reading “Allow Domain User To Update Department Field in Active Directory”

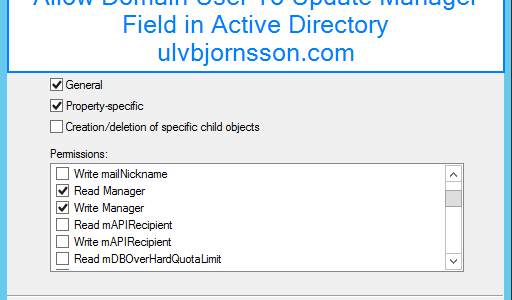
Allow Domain User To Update Manager Field in Active Directory

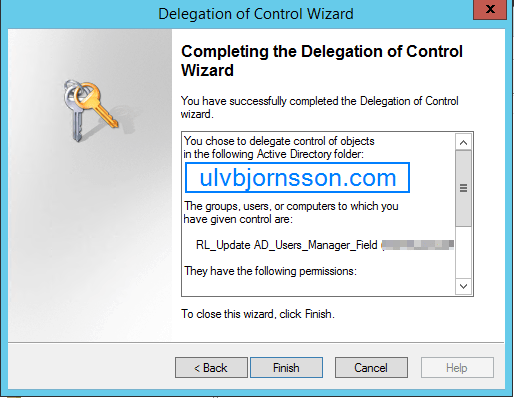
In this article we’ll go through the steps to allow a domain user that is a member of a security group, to update the manager field in Active Directory.

So open up Active Directory Users and Computers and create a Security Group that we will delegate control to, for this example we have created a group called “RL_Update_AD_Users_Manager_Field”


Now we have to also choose the container that this group can edit Users in to for this example we have a “Users”-container in our “domain“.

RoyalTS_2017-05-08_13-58-06.png

This opens up the Delegation of Control Wizard. Hit Next.

2017-05-08_12-30-50

Continue reading “Allow Domain User To Update Manager Field in Active Directory”

Allow Domain User To Add Computer to Domain

In this guide we’ll go through the steps to allow a domain user, to add a computer to the domain. This can be nice in scenarios where some of the preparation for a PC is done by office staff, or if there are branch offices that need to re-join after resetting a PC and so-on.

An authenticated user, has by default the right to join up to 10 computers to the domain. After exceeding this limit the user will recieve an error message.

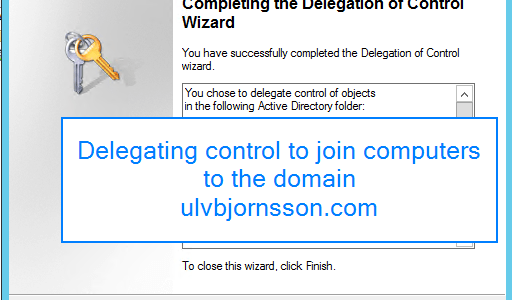
To get around this we can delegate the right to Create Computer Objects in Active Directory. This ensures that there is no restriction on number of computer objects that the user with this delegation right can add to the domain.

The best way of achieving this is by delegating control to a “Security Group” that we create in “Active Directory”

Delegating rights to User/Group with Active Directory Users and Computers

Continue reading “Allow Domain User To Add Computer to Domain”

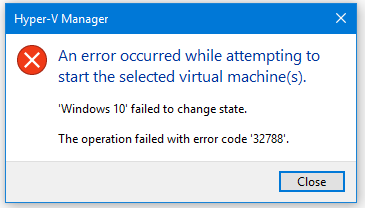
Hyper-V Manager: failed to change state. The operation failed with error code ‘32788’

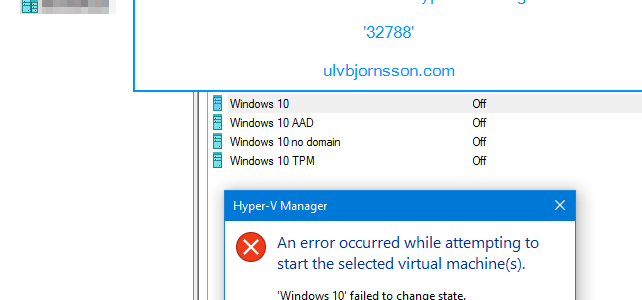
Now you are likely here, because you are currently getting this error message: 32788.

2017-05-04_13-29-13.png

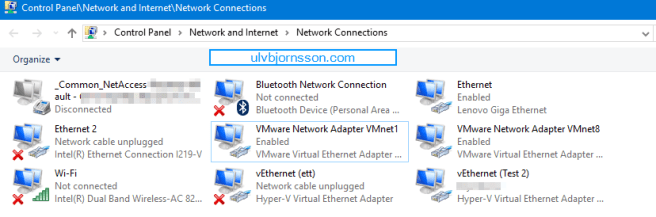
Most likely you’ve recently played around with your “Network Adapters

2017-05-04_13-23-02.png

or you’ve been in the “Virtual Switch Manager” and perhaps deleted a “Virtual Switch.

So to resolve it, quick and easy. You can do the following:

Continue reading “Hyper-V Manager: failed to change state. The operation failed with error code ‘32788’”

Installing VMware Identity Manager Connector

Hi again, and now we’ll go through how you install a VMware Identity Manager Connector.

First off with the prerequisites and some data you need to have to proceed through this guide:

You will need:

  • VMware Identity Manager-tenant
  • OVA-file (the VMware Identity Manager Connector software)
  • Set up a DNS record
  • Service Accounts: for binding to LDAP and domain joining the Connector
  • Connector activation code (which we gather from our VMware Identity Manager-tenant)

Continue reading “Installing VMware Identity Manager Connector”

Setting up AirWatch for Integration with Identity Manager: Part 2

Configure AirWatch settings in VMware Identity Manager to integrate AirWatch with VMware Identity Manager and enable the AirWatch feature integration options. The AirWatch API key and the certificate are added for VMware Identity Manager authorization with AirWatch.

Now if you are just jumping into this series, you need to know that you require to have this in place to complete the steps outlined here. If you haven’t you can check out Part 1.

  • AirWatch server URL that the admin uses to log in to the AirWatch admin console.
  • AirWatch admin API key that is used to make API requests from VMware Identity Manager to the AirWatch server to setup integration.
  • AirWatch certificate file used to make API calls and the certificate password. The certificate file must be in the .p12 file format.
  • AirWatch enrolled user API key.
  • AirWatch group ID for your tenant, which is the tenant identifier in AirWatch.


Continue reading “Setting up AirWatch for Integration with Identity Manager: Part 2”

Setting up AirWatch for Intergation with Identity Manager: Part 1

First off ensure you have this in place:

  • The organization group in AirWatch that you are configuring VMware Identity Manager is organization type: Customer.
  • REST API admin key for communication with VMware Identtiy Manager service and a REST enrolled user API key for AirWatch Cloud Connector password authentication are made at the same organization group where VMware Identity Manager is configured.
  • API Admin account settings and the admin auth certificate from AirWatch added to the AirWatch settings in the VMware Identity Manager admin console.
  • Active Directory user accounts set up at the asme organization group where  VMware Identity Manager is configured.
  • If end users are placed into a child organization group from where VMware Identity Manager is configured after registration and enrollment, User Group mapping in the AirWatch enrollment configuration must be used to filter users and their respective devices to the appropriate organization group.

You can find these in your AirWatch Admin console:

  • REST admin API key for communication: System -> Advanced -> API -> REST API
  • API Admin account for VMware Identity Manager and the admin auth certificate that is exported form AirWatch and added to the AirWatch settings in VMware Identity Manager.
  • REST enrolled user API key used for AirWatch Cloud Connector password authentication.


Continue reading “Setting up AirWatch for Intergation with Identity Manager: Part 1”

Integrating AirWatch with Active Directory

We are going to connect your AirWatch environment with your Active Directory. We will be using the Directory Services page to configure the settings that let you integrate your AirWatch server with your organization’s domain controller (the server hosting your directory services system).

The scenario outlined in this tutorial assumes that you already have the following items:

  • Active Directory
  • AirWatch

Continue reading “Integrating AirWatch with Active Directory”

Installing and configuring the AirWatch Cloud Connector


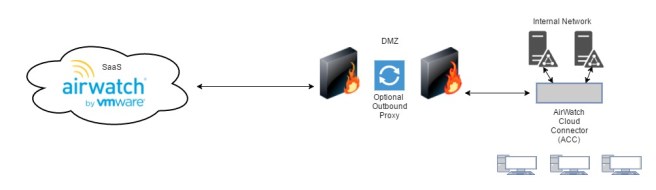
First we will install the AirWatch Cloud Connector (ACC) by enabling it in the AirWatch Admin Console and then we download and run the installer file onto the server that will host the service.

Installing the AirWatch Cloud Connector (ACC) includes the following tasks:

  • Enable the ACC in the AirWatch Admin Console
  • Generate the certificate that will be used for communication between the ACC and the AirWatch environment.
  • Configure the ACC with the services we will be using.
  • Download the ACC installer and install it.
  • Verify that the installation was successful, and that communications pass between the AirWatch SaaS to the ACC, and the ACC to the AirWatch SaaS.

AirWatch Cloud (1).jpg

Continue reading “Installing and configuring the AirWatch Cloud Connector”